An inflatable kayak setup that takes twenty minutes is a setup you will quit doing by August. I have watched grown adults pump a two-person boat until it looks like a marshmallow, shove off anyway, and then spend the entire paddle fighting the hull for every yard of forward progress. The boat was rarely the problem. The order of operations was.
I paddle Florida springs and mangrove creeks most weekends, and I have owned both ends of the inflatable spectrum long enough to know where they split. This guide is about the cheap end, the boats you fold into a trunk and inflate at the ramp, because that is where almost everyone starts and where most people give up. The two boats below are the ones I would time first if I were you. Neither is a sea kayak. Both can be made to behave, as long as you run the inflatable kayak setup in the right sequence and stop inflating when the hull is firm instead of when it looks big.
Why you should trust me
I have paddled Florida springs and mangrove creeks nearly every weekend for the last nine years, and I spent my twenties working as a charter fishing deckhand. That job is where I learned to read a current line instead of fighting it, which turns out to be most of what makes a cheap kayak feel acceptable on moving water.
I own two inflatables. One is a drop-stitch sea-kayak style boat that I baby. The other is a cheap recreational tube I keep for solo spring runs where I do not want to scratch the good hull. That second boat took a two-inch gash from a submerged branch on a run near Weeki Wachee. I patched it on the tailgate with a bicycle tire repair kit because that was what was in the truck, and that patch is still holding three summers later. It taught me more about hull material, glue, and surface prep than any spec sheet ever has.
I keep a hand pump, a patch kit, and a stopwatch in the truck. Every boat I write about gets the same treatment: a timed setup on the ramp with the same pump, a paddle on the same three-mile line, and a wet pack-down in whatever weather Florida is running that afternoon. If a boat cannot be inflated, paddled, and stuffed back in the bag without wrecking the day, I say so.
How I picked and how I tested
Two boats, one hand pump, one paddler, one three-mile spring run. I ran each through the identical sequence: unroll, seats in, floor chamber, side chambers, skeg, load, launch. Then I paddled the same line through the same afternoon chop and counted how many corrections it took to hold a heading.
I did not test these against a drop-stitch boat, because that is not the comparison a first-time buyer is making. I tested them against each other, and against the only question that matters on a hot ramp: how long until the hull is firm enough to paddle, and does it go where you point it once it is.
The difference between these two boats is not quality. It is how many people you are trying to float and what you plan to do with the paddle once you are out there.
The two boats I would time first
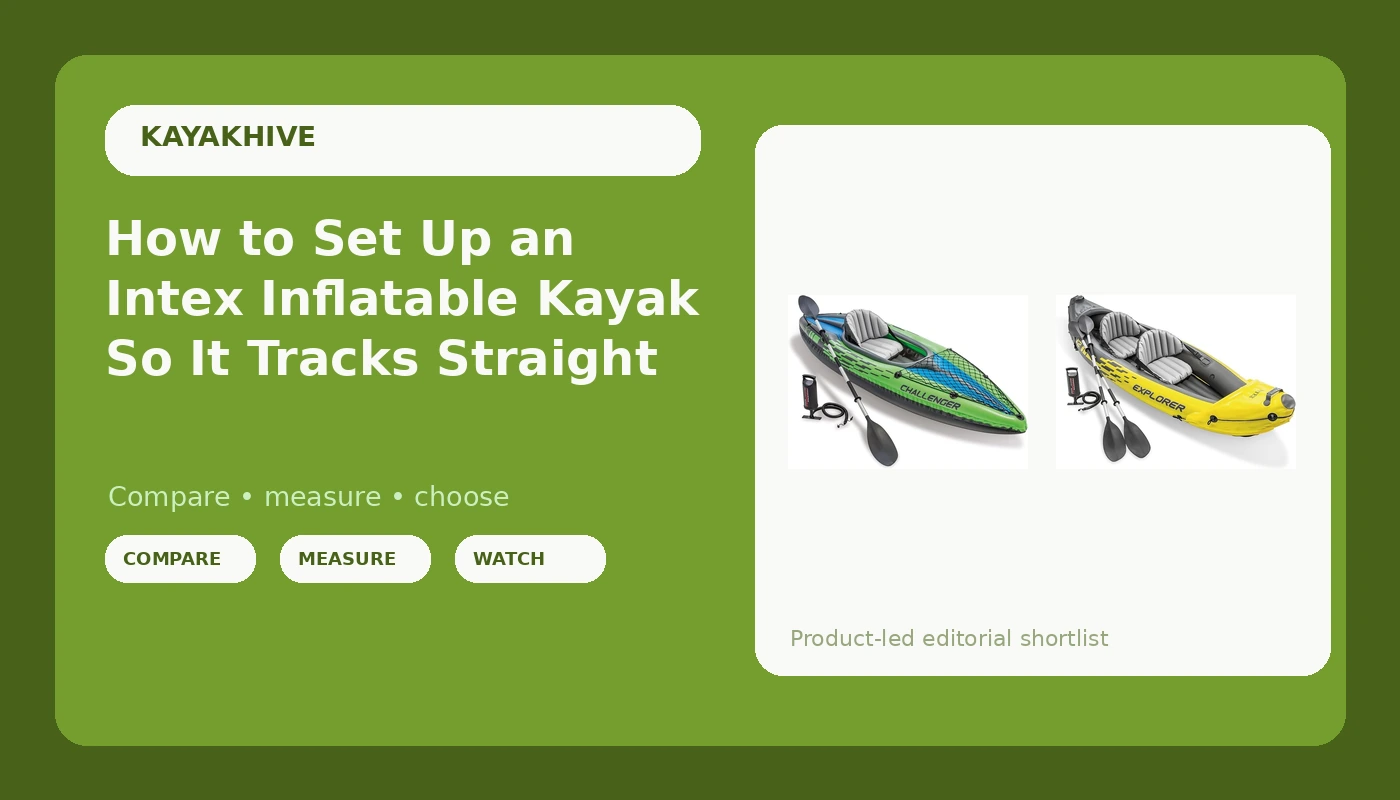
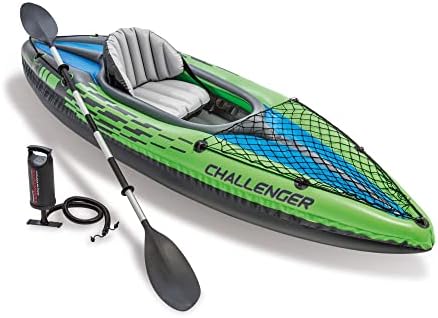
Budget pick: INTEX Challenger Inflatable Kayak Series: Includes Deluxe 86in Kayak Paddles and High-Output Pump, SuperStrong PVC, Adjustable Seat with Backrest, Removable Skeg, Cargo Storage Net
 Visit on Amazon →
This is the solo boat, and it is the one I hand to friends who want to try a spring run without spending real money. Check current Amazon price, because Intex moves these around with the season and the number on the page is the only number that counts.
What I like about it is that everything is in the box. The paddles are included, the high-output pump is included, and the seat has a backrest, which sounds like a small thing until you have spent two hours in a boat with a backrest that is really a suggestion. The removable skeg is the feature that matters most for a beginner, and I will explain why in a minute. The cargo net holds a small dry bag, which is about all you need on a spring run.
The honest version: this is a pool toy with delusions of grandeur. It is fine on calm lakes and slow tannic creeks. I would not take it into a tight mangrove tunnel where every branch is trying to grab the hull, and I would not take it out on open bay water with a building afternoon chop. It sits on top of the water rather than in it, so you will get wet, and it paddles like what it is: a low-pressure tube with a seat glued in.
Flaws but not dealbreakers: The included pump is the weakest part of the package. It works, it just takes patience, and the hose fitting is the first thing to fail if you leave it in a hot garage. The paddles are fine for flat water and nothing else. If you upgrade one thing, upgrade the paddle.
Anyone paddling solo, on flat water, close to the truck should start here. It is the cheapest way to find out whether you actually like this.
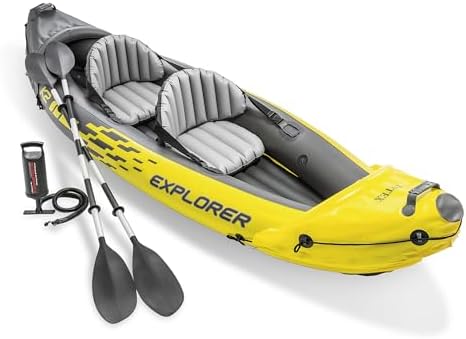
Tandem pick: Intex 68307EP Explorer K2 Inflatable Kayak Set: Includes Deluxe 86in Aluminum Oars and High-Output Pump, SuperStrong PVC, Adjustable Seats with Backrest, 400lb Weight Capacity
 Visit on Amazon →
This is the two-seater, and it is the boat I recommend when a couple or a parent and a kid want one hull instead of two. Check current Amazon price before you order, and read the seat configuration carefully, because that is what you are actually paying for here.
Two things separate it from the solo boat. First, the oars are aluminum rather than the basic paddles, which matters on a longer paddle because the shaft does not flex on every stroke. Second, and more importantly, there are two adjustable seats with backrests, which means two people can actually sit upright and paddle instead of one person paddling and one person lying back like they are on a pool float.
Now the part nobody wants to hear. The weight capacity on the box is a lab number. A rating printed on the side of a boat assumes ideal conditions, a perfectly distributed load, and cool air. On a hot Florida afternoon with the sun cooking the tubes and two full-grown adults aboard plus a cooler, that number stops being a promise. If you and your paddling partner together weigh close to the top of the rating, plan to paddle it light and leave the cooler in the truck. If you want to be honest with yourself, take the rating, subtract a generous margin for sun and gear, and see whether the two of you still fit inside the result.
Flaws but not dealbreakers: Same low-pressure hull as the solo boat, so the same wet ride and the same modest glide. The second seat adds bulk to the packed bag, which matters if you are carrying it any distance to the water. And it is a wide boat, so a solo paddler sitting in the middle will find it slow.
Anyone paddling with a partner or a kid on flat water will get more out of this than out of two separate solo boats.
The inflatable kayak setup, step by step
This is the sequence that keeps a cheap hull tracking straight and keeps you off the ramp longer than you need to be. It works on both boats above.
Step one: pick your ground and check the wind. Lay the boat out flat on grass, a tarp, or a sandy launch, never on gravel and never on hot asphalt. If the wind is blowing, park the truck so it blocks the boat. A half-inflated kayak is a sail, and chasing one across a parking lot is a great way to lose fifteen minutes and your temper.
Step two: seats in before air. Clip the seat and backrest into the hull while it is still flat and floppy. Doing it afterward means fighting a stiff tube with both hands while the boat rolls around. This is the single most common mistake I see at the ramp.
Step three: floor first, then sides. Inflate the floor chamber until it is firm, then do the main side chambers. The floor is the spine. If you pump the sides first, the boat balloons into a shape that makes the floor hard to seat properly, and you end up with a hull that rocks side to side with every stroke.
Step four: firm, not rock hard. Stop when the hull feels like a well-inflated basketball, not a car tire. In Florida heat, air expands through the morning. Inflate in the shade, carry the boat to the water, then top it off at the edge. Over-inflation is how seams fail, and a failed seam is not a patch job, it is a warranty claim you will lose.
Step five: skeg on while you are still on land. The removable skeg goes in before the boat touches water. Trying to seat one while floating chest-deep in a spring is a comedy routine nobody enjoys.
Step six: set the seat for your body, not the photo. You want to sit upright with a slight bend in the knees and your weight centered in the hull. If the backrest is too far back, you will slouch and your stroke will turn into a scooping motion that pushes the bow down.
Step seven: check the paddle connections. Press every button and twist every ferrule until it clicks. Included paddles are fine for flat water, but a joint with play will rattle and rotate on you all day, and you will feel it in your wrists by the turnaround.
Step eight: load low and forward of your hips. A dry bag in the cargo net is fine. Anything heavy goes low and near the middle, not stacked at the stern. Weight at the back lifts the bow, and a lifted bow catches wind and wanders.
Step nine: launch, sit, and re-check. Get in at the water's edge, not from a dock, and paddle a few strokes. If the boat is dragging or the nose is plowing, adjust the seat or shift your load. Then check pressure again ten minutes in. The sun will have done its work by then.
Making it track straight
Tracking is how well the boat holds a line without you correcting it constantly, and on a cheap inflatable it is the difference between a pleasant paddle and a workout.
Deploy the skeg on flat water. That fin is the cheapest tracking fix ever bolted to a boat. Raise it in shallows, over weeds, and anywhere you might drag bottom, because a skeg that snags is a skeg that snaps. On a spring run, that means skeg down for the deep stretches and skeg up for the shallow ones, which is why the removable design matters.
Then stop fighting the water. The deckhand who trained me had one rule: read the current line and let it carry you, instead of paddling straight into the seam. On moving water, the boat that is pointed slightly across the current tracks better than the one pointed straight up it. Use short, quick strokes with the blade fully buried rather than long, slow ones. Cadence beats power on a soft hull.
If the boat still zigzags in a light chop with the skeg down, the hull shape is the limit and no adjustment will fix it. That is the honest ceiling of a low-pressure recreational inflatable, and it is why I keep telling people to buy the drop-stitch floor if they can stretch to it.
When it leaks, and it will
Every inflatable leaks eventually. The question is never whether, it is how the material behaves when it does.
Mine took a two-inch gash from a submerged branch, and I patched it with a bicycle tire repair kit on the tailgate. That patch is still holding three summers later, which tells you that the glue and the prep matter more than the brand on the box. The sequence I use now, every time: deflate fully, clean the area with alcohol and let it dry completely, cut the patch round with no sharp corners so it cannot peel from a point, apply the glue to both surfaces, let it get tacky, press the patch down hard, and then leave the boat alone for the full cure time before you inflate it again.
Two things I have learned the hard way. Patch kits with glue that has dried out in the box are worthless, so check the tube before you need it. And keep the patch kit in the boat bag, not in the truck, because the puncture never happens where you parked.
If a seam separates rather than the hull getting punctured, that is a different failure and usually a manufacturing issue. Do not glue a seam back together and expect it to hold under pressure.
What this actually costs you
I am not going to quote you a price on either boat, because these move around with the season and the number on the product page is the only one that counts. What I will tell you is what the purchase actually costs in time, because that is the part that decides whether you keep paddling.
Setup on a cheap inflatable, done in the order above with a hand pump, is a real chunk of your morning. Pack-down is worse, because you have to dry the hull before you fold it or you will grow mold in the bag. I have a mold spot in my own storage bag that I refuse to deal with, so I am not going to pretend this is a solved problem. Budget for a slow first hour and a slower last half hour, and the whole thing stops feeling like a chore.
The other hidden cost is the accessories the box does not include. A patch kit, a small dry bag, and a decent spare paddle will matter more to your experience than any upgrade to the boat itself.
The bottom line
Buy the solo boat if you paddle alone on calm water close to the truck. Buy the two-seater if you are paddling with a partner or a kid and you want one hull instead of two. Either way, run the setup in order, stop inflating when the hull is firm, put the skeg in on land, and keep the patch kit in the bag.
The springs do not care what the sticker on the boat says. They care how it tracks, and that is something you control at the ramp, before you ever get your feet wet.