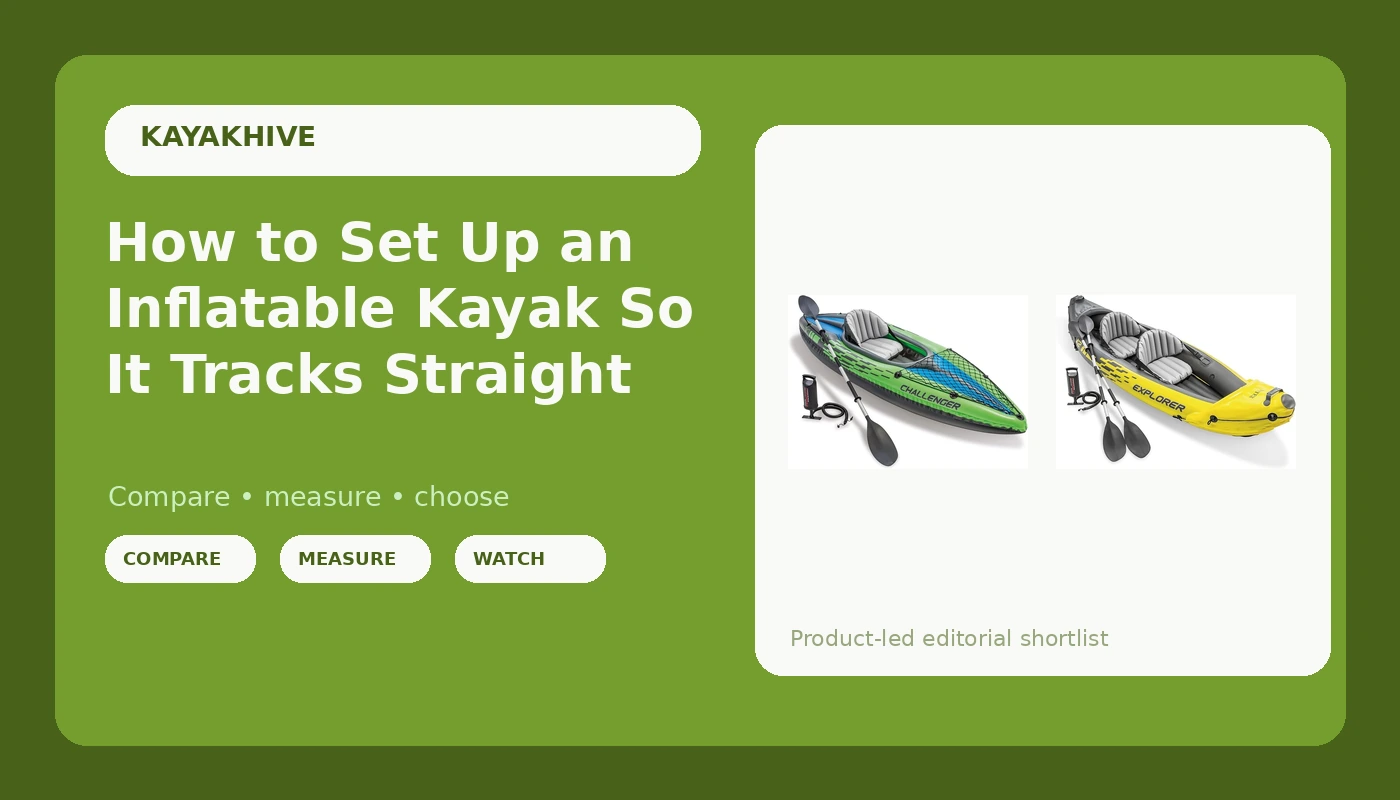
Most people inflate an inflatable kayak until it looks full, drop it in the water, and then spend two hours fighting the boat instead of paddling it. Inflatable kayak setup is not complicated, but the order you do things in matters more than the boat you bought. Pressure, floor stiffness, seat position, and the skeg are the four levers you actually control, and three of them are free.
I have paddled Florida springs and mangrove creeks almost every weekend for nine years, and I have watched a lot of people launch soft boats. A soft boat does not track. It does not hold a line in wind. It flexes under your hips with every stroke, which means all your energy goes into deforming the hull instead of moving it forward.
The routine below is the one I run on my own boats. It takes about the same amount of time as the version most people use, and it produces a completely different kayak on the water.
Why you should trust me
I paddle out of Tampa and I own two inflatables: a drop-stitch sea-kayak style boat that handles open water, and a cheap recreational tube I keep for solo spring runs I do not want to scratch the good hull on. I have patched the cheap one twice, once with a bicycle tire repair kit after a submerged branch tore a two-inch gash in the side. That patch is still holding three summers later, which taught me more about hull material and glue than any spec sheet ever will.
There is a hand pump, a patch kit, and a stopwatch in my truck at all times. Every boat I write about gets a timed setup on the ramp before anything else happens, and every trip ends with the kayak packed wet in the rain so I know how long that really takes. I am not interested in how a boat looks on a showroom floor. I am interested in whether it gets me back to the ramp.
How I picked and how I tested
This is a setup guide, not a shootout, but the two kits below earned their spot the same way everything else does: same hand pump, same paddler, same three-mile spring run, stopwatch running from tailgate to water.
Three things get checked before I trust any inflatable. How long it takes to reach proper pressure with a real hand pump, because a fifteen-minute pump session kills the trip. How stiff the floor gets once it is there, because floor stiffness is what you are actually paying for and it is what keeps your hips from sinking. And what the hull material does when it gets cut, because every inflatable leaks eventually and the only question that matters is whether the damage patches clean or spreads.
Weight ratings get checked with a real paddler aboard. A number printed on a box and a body sitting in a seat are two different measurements.
The two kits I would start with
Both of these are Intex boats. Both are low-pressure PVC recreational kayaks, and both ship with a pump and paddles in the box, which matters more than people think. A boat without a pump and a paddle is not the price on the page, it is the price on the page plus a pump plus a paddle. Check what is in the box before you compare anything.
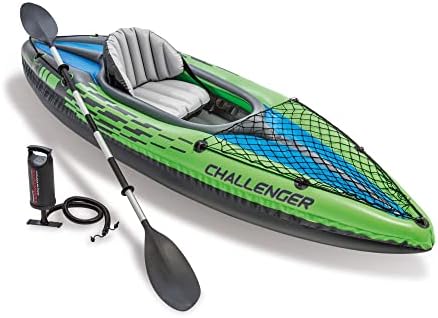
Best solo pick: INTEX Challenger Inflatable Kayak Series: Includes Deluxe 86in Kayak Paddles and High-Output Pump, SuperStrong PVC, Adjustable Seat with Backrest, Removable Skeg, Cargo Storage Net
 Visit on Amazon →
This is the one I hand to somebody who wants to paddle a calm lake or a slow creek this weekend and does not want to spend drop-stitch money to find out whether they like it. It comes with the 86-inch paddles, the high-output hand pump, an adjustable seat with a backrest, a cargo net, and a removable skeg.
That removable skeg is the reason this boat tracks better than it has any right to. A short recreational hull wants to wander, and a fin on the stern fixes most of that for free. If you take nothing else from this article, take the skeg seriously.
The honest caveat is that this is a recreational boat. Calm water, light wind, short distances. It is a pool toy with delusions, and I mean that as a compliment, because a pool toy that gets you on the water on a Saturday morning is worth more than a boat you never launch. Do not take it into current, chop, or open bay water and expect it to behave like a sea kayak.
Flaws but not dealbreakers: The floor is not drop-stitch, so it gives under your weight. You will feel it. Pump it hard, sit with your weight forward of the seat back, and it settles down. The seat backrest is thin, and a folded towel behind your lower back is a legitimate upgrade.
Anyone paddling solo on flat water within sight of shore will be happy with this one.
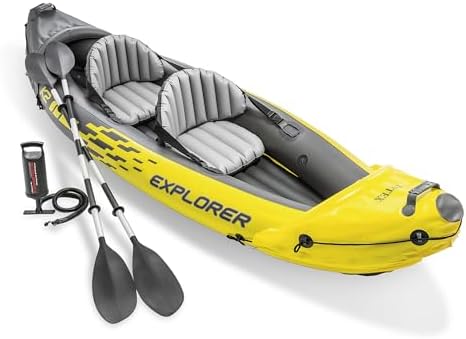
Best tandem pick: Intex 68307EP Explorer K2 Inflatable Kayak Set: Includes Deluxe 86in Aluminum Oars and High-Output Pump, SuperStrong PVC, Adjustable Seats with Backrest, 400lb Weight Capacity
 Visit on Amazon →
The K2 is the two-person version of the same idea, and it ships with two adjustable seats with backrests, 86-inch aluminum oars, and the same style of high-output pump. Aluminum oars are a step up from plastic blades, and you notice it on a long, slow paddle back into the wind.
On that 400 lb weight capacity: treat it as a lab number, not a promise. Two adults plus a cooler plus a dry bag is a real load, and a hot afternoon with a headwind on a big lake is not the same test the rating was written for. If you and your partner together weigh north of 350 pounds, put the heavy gear in the middle of the boat and leave the cooler on the shore.
Tandem tracking is a rhythm problem more than a hull problem. The front paddler sets the cadence, the rear paddler matches it, and the boat runs straight. Two people paddling at different rates will zigzag no matter how good the hull is.
Flaws but not dealbreakers: Two paddlers in a wide, flat-bottomed hull make for a slow boat. It is stable and it floats high, but you will not win any races. The seats adjust, but the range is limited, so taller paddlers should test the legroom on the first short trip before committing to a long one.
Anyone who wants to take a kid or a partner out on flat water without buying two boats should look here first.
How to set up an inflatable kayak: the order that works
Now the actual procedure. This is the same sequence I run whether I am on a boat ramp in February or a sandy launch in July.
Step one: Pick your inflation spot before you unroll anything. You want flat ground, no shell fragments, no gravel, no broken glass. Inflating a PVC hull on top of a sharp shell is how you start a trip with a slow leak. If the only flat spot is pavement, lay the carry bag down and inflate on top of it.
Step two: Find the valves and check them closed. Every chamber has a valve with a stem. Twist or press it shut before you start pumping. A valve left open while you pump is the single most common reason a boat takes twenty minutes to inflate.
Step three: Floor first, then the side chambers. A soft floor pulls the side tubes inward and creates a wrinkle at the seam that no amount of pumping fixes later. Floor, then sides, then top off the floor again.
Step four: Get to real pressure, not "looks full." These are low-pressure boats, and the correct number is in the manual that comes with the kit. Hit it. Use your body weight on the pump rather than your arms, keep both feet planted, and expect the last twenty percent to take as long as the first eighty. A boat that looks full and a boat that is at pressure are two different boats on the water.
Step five: Set the seat and the backrest where they actually go. Move your weight forward and the bow digs and the boat wanders. Move it back and the stern squats and the bow rides up and catches wind. Start with the seat centered, paddle a hundred yards, then adjust once.
Step six: Decide on the skeg. Flat water, wind, open stretches, deploy it. Shallow rocky water, a launch where the fin drags through sand, or a stretch where you will be scraping bottom, pull it. On the Challenger it is removable, and using that feature is not cheating.
Step seven: Load the cargo net low and centered. A heavy dry bag high in the bow acts like a sail and a rudder at the same time. Keep weight down and toward the middle of the boat, and strap anything loose so it does not shift when you lean.
Step eight: Top off at the water, then again after twenty minutes. PVC relaxes in the sun and it contracts in cold water. A boat that was at pressure in the parking lot will be soft ten minutes into a shaded spring run. Carry the pump in the boat, not in the truck, and give every chamber a squeeze and a top-off at the halfway point.
What goes wrong, and the fix
The boat goes soft in the sun. That is normal. PVC expands and relaxes as it heats, and the pressure you set in the shade reads differently in direct sun. Top off, do not overfill. If a chamber is rock hard in the sun, it will be dangerously tight when it cools in the shade, and it will be soft again an hour later.
It will not track straight. In order: deploy the skeg, fix your seat position, match your cadence with your partner, and check that your gear is not piled in the bow. A wandering inflatable is almost always a trim problem, not a hull problem.
You pick up a pinhole. Patch it properly with a PVC patch and fresh glue, on a clean, dry, deflated surface, and let it cure longer than the box says. I once sealed a two-inch gash with a bicycle tire repair kit because it was all I had on the water, and it held for three summers. That is not a recommendation, it is a demonstration that the hull material takes a patch well when the surface is clean.
The patch kit glue is dried out. Open it before you leave the house. This happens constantly, and discovering it on the water is a bad afternoon. Buy a second kit and keep it sealed in the truck.
The storage bag smells like a locker room. Dry the boat. Really dry it. Hang it over a fence in the shade for an afternoon, wipe the inside of the hull with a towel, and let the valves sit open overnight. I have a mold spot in one of my own bags that I keep refusing to deal with, and every time I open it I remember why I tell people to dry their boats.
When an Intex is the wrong boat
Both kits above are calm-water boats. If your plan involves open bay water, boat wakes, a long crossing, or an afternoon where the wind is forecast to build, they are the wrong tool and no setup routine fixes that.
The upgrade path is a drop-stitch floor boat. That is not a magic word, it is a construction method: thousands of threads link the floor's two layers so it inflates board stiff instead of balloon soft, and the difference between paddling and floating is exactly that stiffness. If you find yourself wanting to paddle distance, or you are tired of the hull flexing under your hips, that is the sign to move up, not the sign to pump harder.
A hardshell is the other direction, and it tracks like nothing inflatable does. It also lives on a roof rack and takes up a garage wall. For most people who paddle a few times a month, an inflatable that actually gets used beats a hardshell that does not.
What the setup actually costs you
The money is the easy part, and it is mostly already in the box. Both kits include the pump, the paddles, and the seats, so the number you see on the product page is close to the whole number. The extras worth buying are a spare patch kit, a second hand pump to keep in the truck, and a dry bag for the cargo net.
The part that decides whether you actually use the boat is time, not dollars. Fifteen minutes of proper setup, including the top-off at the water, is the difference between a hull that tracks and a hull that wallows. Fifteen minutes against a four-hour paddle is nothing.
Do it in the same order every time. Floor, sides, pressure, seat, skeg, load, top off. Once the sequence is in your hands you stop thinking about the boat and start reading the water, which is the whole point.