Most inflatable kayaks fail on the boat ramp, not on the water. The paddler fights a hand pump for twenty minutes, never gets the floor stiff, shoves off with a soft hull, and then wonders why the boat wallows sideways in the first chop. Inflatable kayak setup is the spec that never makes it onto the box, and it decides whether you spend the day paddling or floating.
I have paddled Florida springs and mangrove creeks out of Tampa for nine years, and I spent my twenties on a charter fishing deck reading current lines instead of marketing copy. That background taught me one thing the catalogs never will: the water does not care what the sticker says. It cares how the hull tracks, how fast it inflates with a real pump, and how it behaves when you load it with an actual adult and a cooler.
This is the order I set up any inflatable, plus the two boats I would point a first-time buyer toward for the two most common jobs out there. One is a tandem boat for two paddlers and gear. The other is a light solo boat for one person on a lake or river with a rod in hand.
Why you should trust me
I keep a hand pump, a patch kit, and a stopwatch in the truck, and every boat I look at starts with a timed inflation on the ramp, three runs, same pump, same paddler. No boat gets a recommendation from me without that stopwatch number, because a fifteen-minute pump session is the thing that kills a trip before it starts.
I also own two inflatables. One is a drop-stitch sea-kayak style boat I treat gently. The other is a cheap recreational tube I keep for solo spring runs where I do not want to scratch the good hull. A submerged branch tore a two-inch gash in that cheap one a few summers back, and I patched it on the tailgate with a bicycle tire repair kit. That patch is still holding three summers later, which taught me more about hull material and glue than any spec sheet ever has.
My standards are blunt. No "tough" claim without a patch test on the actual hull material. No weight rating repeated without a note on how the boat behaves with a real two-hundred-pound paddler aboard. No "packs to the size of a backpack" claim when the backpack is the size of a body bag. And no setup time quoted by anyone who clearly never timed it.
How I tested and how I sorted these two
Here is the protocol I run on every inflatable. First, timed inflation to target pressure with a real hand pump, not an electric pump that needs a car battery and twenty minutes. Second, floor stiffness, checked by pressing the heel of my hand into the floor to see whether it flexes like a board or a balloon. Third, tracking in a light chop, because if a boat will not hold its line without constant rudder corrections, it does not matter how pretty the color is. Fourth, a pack-down while wet, in the rain if I can get it, to see how long the whole thing really takes when the day is over and you are tired.
The two boats in this guide are sorted by the job, not by brand loyalty. The drop-stitch tandem is the answer for two paddlers with a cooler and a dry bag, because drop-stitch is a construction method, not a magic word, and what you are actually paying for is a floor that inflates board-stiff. The nine-foot solo boat is the answer for one angler on a calm lake or a slow river who wants oars and a pump in the box and does not want to spend tandem money.
What I cannot do from a keyboard is time these exact hulls. So treat the checklist below as the work you do before your first launch, and let the stopwatch settle the argument.
What you need before you start
Do not start inflating anything until these are on the ground beside you.
- A dual-action hand pump with a pressure gauge on the hose. The gauge matters more than the pump.
- A patch kit with glue that has not dried out in the box. Squeeze the tube before you trust it.
- A spare valve wrench and a roll of strapping tape for emergencies.
- A PFD that fits, and a paddle long enough for your shoulders.
- A tarp or a patch of grass. Sand and gravel under a hull is how you find a leak the hard way.
- A towel and a dry bag, because you will pack this boat wet more often than you pack it dry.
Check what ships in the box before you order anything else. One of the two boats below includes oars and a high-output pump, and the other one may or may not include a pump, so read the listing carefully.
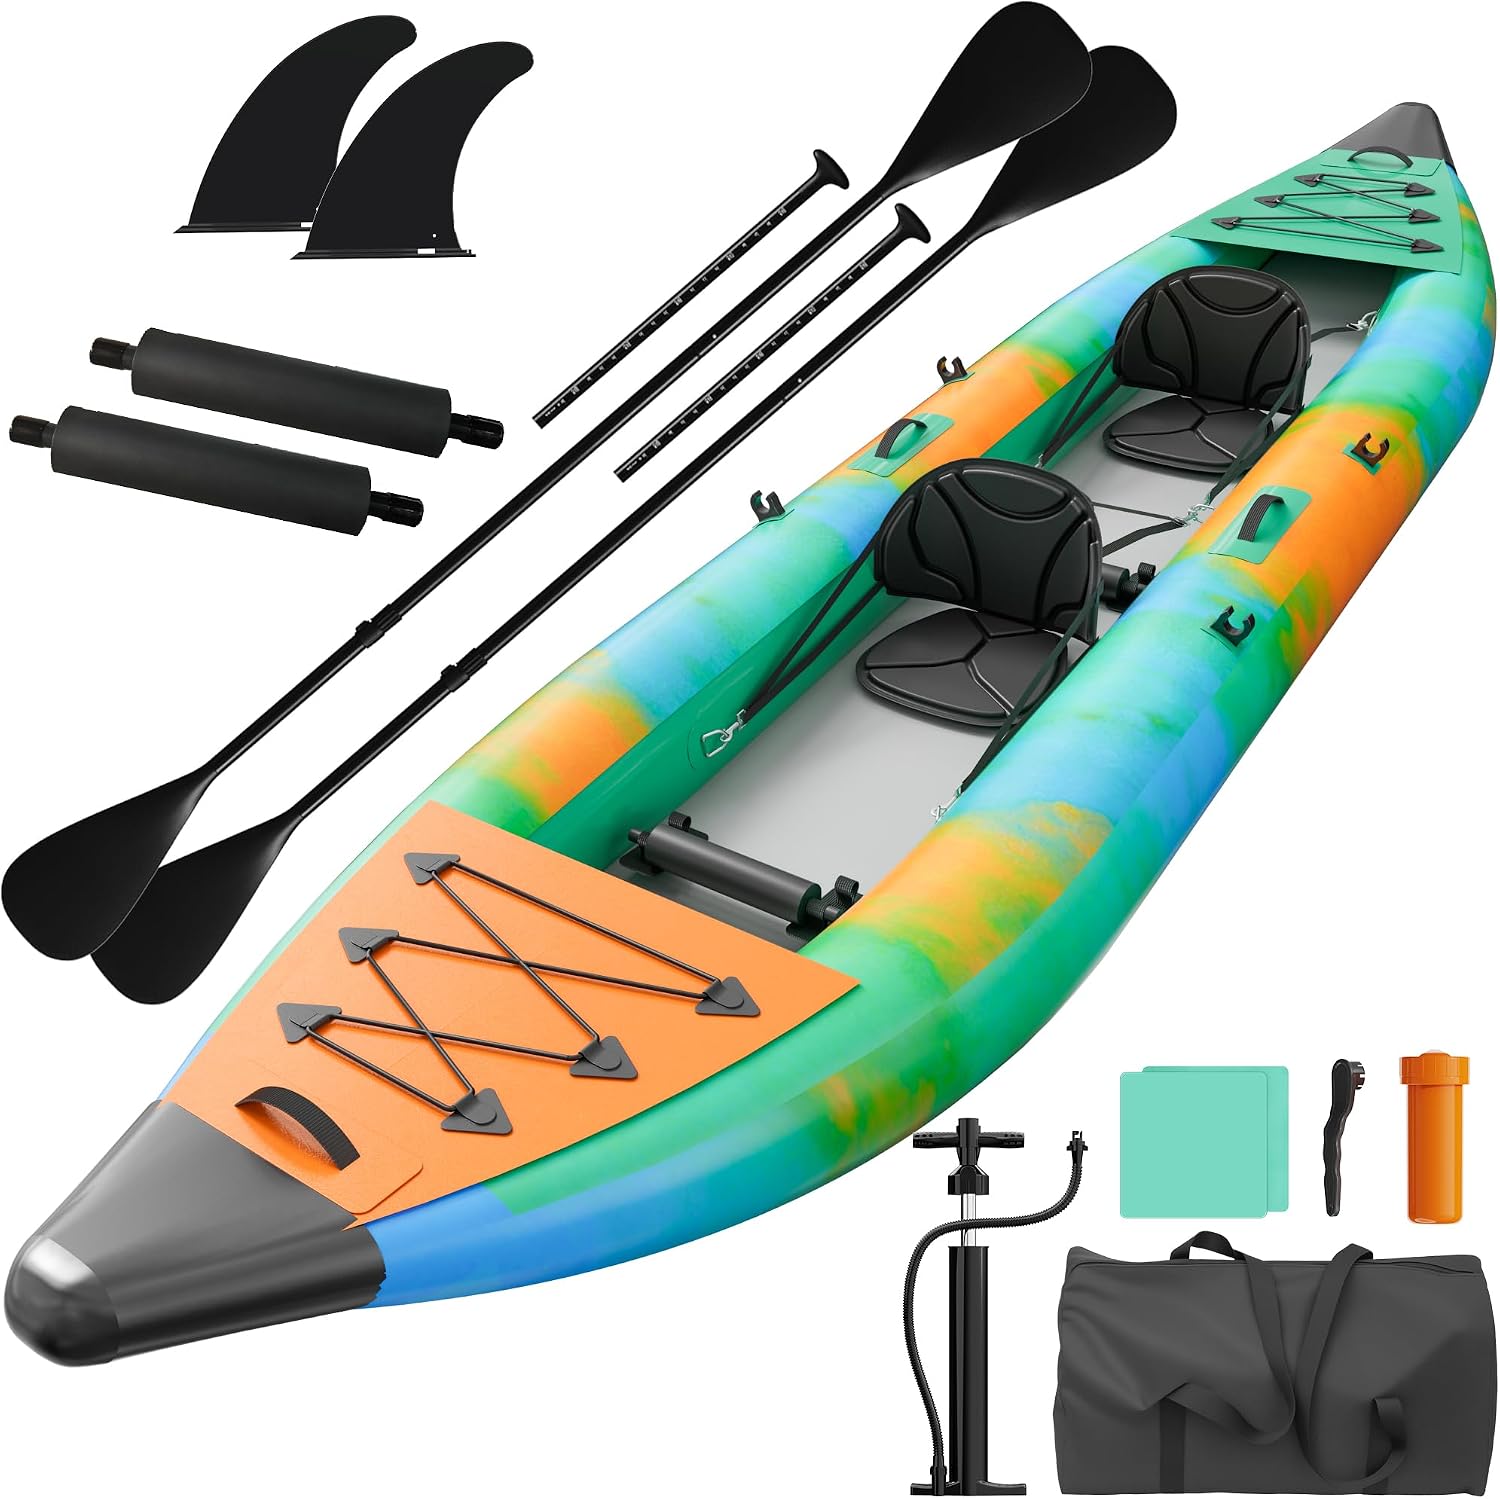
Best for two paddlers and a full day of gear: PPOLB Inflatable Kayak 2-Person, 12.5 FT, 507 LBS Capacity, Drop-Stitch
 Visit on Amazon →
This is the boat I would hand two adults who want to bring gear and not worry about the floor folding under them. Twelve and a half feet is a real hull length, which means it has enough waterline to hold a line in a light chop instead of spinning every time the wind shifts. The drop-stitch floor is the reason to look here. Thousands of polyester threads link the top and bottom layers of that floor, so it inflates into a stiff platform instead of a soft cushion, and that stiffness is what your paddle stroke actually pushes against.
The 507-pound capacity figure is a lab number. Two hundred pounds of paddler plus a cooler plus a dry bag plus a dog is already a different animal. Plan on roughly half of any printed capacity as your realistic working load on a hot afternoon, then load it that way on flat water before you commit to a long run.
Flaws but not dealbreakers: Drop-stitch floors want high pressure, which means more pump strokes and a gauge you actually trust. If the listing does not clearly include a pump and paddles, budget for both.
Two paddlers, calm lakes, springs, slow rivers, and anyone who has been burned by a soft-floor boat before should start here.
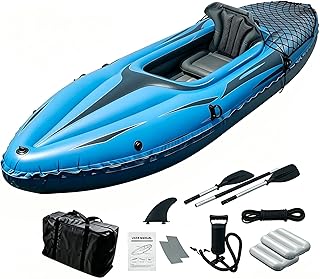
Best solo fishing pick: 9ft Inflatable Fishing Kayak, 1-Person Foldable Boat, 220lb Capacity with Aluminum Oars, High Output Pump, Adjustable Seat, Removable Fins, Cargo Net for Adults, Lakes, Rivers and Fishing
 Visit on Amazon →
This one is built for a single angler, and the parts list tells you why. Aluminum oars instead of plastic paddles, a high-output pump in the box, an adjustable seat, removable fins, and a cargo net. That is a complete starter kit for one person, and the pump alone is the piece most budget boats leave out and make you buy separately.
The removable fins are the feature I care about most. A nine-foot hull has less waterline than a twelve-and-a-half-foot boat, so it wanders more, especially in a crosswind. A deployed fin fixes tracking without you having to buy a better boat. Run the fins on open water, pull them for shallow flats and gravel bars where they would drag.
The 220-pound capacity is a one-adult rating, and it means what it says. One paddler, a small tackle box, one rod, and a net. Add a second person and you are past the number before you leave the ramp.
Flaws but not dealbreakers: At nine feet, this is a short boat. Expect to make more steering corrections than you would in a longer hull, and expect to feel every bit of a headwind. It also sits lower and wetter than a bigger boat, so dress for splash.
Solo anglers on lakes, ponds, and slow rivers who want everything in one box should look here first.
The setup workflow, step by step
This order works on any inflatable, tandem or solo. Follow it and you will shave minutes off every launch for the life of the boat.
Step one: Find flat ground and unroll. Grass, a tarp, or a clean boat ramp apron. Grit under a hull is how you create a leak you will spend a summer chasing. Unroll the boat and locate every valve before you attach a pump.
Step two: Inflate the floor or the drop-stitch chamber first. Bring it up to a soft shape, not full pressure. If you inflate the sides first on a drop-stitch boat, the floor can get pinched and never reach its rated stiffness.
Step three: Inflate the side chambers, then top off the floor. Sides first to shape the hull, floor last to full pressure. Use the gauge. Three PSI is a puddle. A drop-stitch floor at its printed maximum is a board, and that is the pressure you are paying for. Follow the number printed on the hull beside the valve, never a guess.
Step four: Fit the fins or skeg. On the solo boat, that means the removable fins. Seat them fully and check they are straight, because a crooked fin steers you in a slow circle all day.
Step five: Set the seat. Adjustable seats slide fore and aft, and the position changes how the boat trims. Sit slightly forward of center if the bow keeps climbing, slightly back if the bow is digging.
Step six: Load the gear, then check the pressure again. Weight changes how a hull sits in the water, and the pump is still right there. A boat that was firm on the grass is often soft by the time you have a cooler and a tackle box aboard.
Step seven: Launch and recheck after ten minutes. Cold water pulls pressure down, and every inflatable loses a little on the first soak. Ten minutes in, paddle back to the shallows and put the gauge on it. This single habit prevents most of the wallowing and weathercocking complaints people blame on the boat.
Step eight: Test tracking, then fix it with load or a fin. If the boat wanders, first move weight forward or back. If it still wanders, deploy the fin. Only after both of those should you decide the hull is the problem.
Patching, pressure, and the things that bite back
Every inflatable leaks eventually. The question is never whether, it is how easy the material is to patch. The test I run is cheap: when you have a scrap of hull material or an old tube, glue a patch on, let it cure fully, then try to peel it. A patch that grips and tears the material before it releases is a hull worth owning. A patch that lifts clean off tells you the surface is too slick for field repair, and that is a boat I would not take far from the ramp.
In the field, clean the area with alcohol, let it dry completely, apply glue to both surfaces, wait for it to get tacky, then press and hold. Temperature matters more than pressure. A patch applied in direct sun on a hot hull will fail, and a patch applied in cold shade may never cure at all.
Pressure is the other place people get burned. Overinflating a hull on cold morning grass and then leaving it in the sun is how seams let go. Underinflating is how you end up with a boat that folds in the middle and tracks like a shopping cart.
Storage is boring and it is the whole ballgame. Dry the boat completely, including the inside of the floor chamber if water got in, fold it loose rather than tight, and keep it out of direct sun. A tight fold in a hot garage is how you find a crease crack two seasons in.
What the whole kit really costs
The boat is never the whole number. Add a paddle or use the oars that ship with the solo boat, a PFD, a pump if one is not included, a patch kit, and a dry bag. On a budget solo setup, those accessories can rival the boat itself, so price them before you commit.
Check current Amazon price on both boats before you decide, and check what is in each box, because a boat that includes a high-output pump and oars is a different value than one that does not.
Run the math per trip instead of per sticker. A boat you use twenty times a season costs you a fraction of a boat you use twice, and the one that inflates in eight minutes with a real pump is the one you will actually use.
The bottom line
Setup time is the spec that matters. Pick the boat that matches the job, a drop-stitch tandem for two paddlers and gear, a nine-foot solo package for one angler, then inflate it in the right order, gauge in hand, and recheck it ten minutes after launch. Patch the hull before it needs patching, by testing the material, not the marketing. Do that and the boat ramp stops being the hard part of your day.