Most inflatable kayak setup problems are not the kayak. They are the pump session, the floor pressure, and the seat position, in that order. Get those three right and a cheap recreational hull feels surprisingly capable on a calm spring run. Get them wrong and a bigger tandem wallows like a pool float while you fight the current with your shoulders instead of your legs.
I have paddled Florida springs and mangrove creeks most weekends for nine years, and every inflatable kayak setup I do gets timed on the same boat ramp with the same hand pump. That stopwatch habit changed how I think about these boats. A boat that takes fifteen minutes to bring up to pressure does not get used, no matter how good the hull is. Setup time is the spec that matters, and it is the one nobody prints on the box.
This is the routine I actually run, plus the two boats I would point a first-time buyer at: a low-cost recreational tandem that comes with everything, and a longer two-person hull for open water and wind. No magic words about drop-stitch, no weight-rating fantasy. Just the order of operations and the checks that keep you off the bank with a floor that feels like a wet pillow.
Why you should trust me
I worked as a charter fishing deckhand in my twenties, which is where I learned to read current lines instead of fighting them. I own two inflatables: a drop-stitch sea kayak style boat and a cheap recreational tube. I have patched the cheap one twice, once with a bicycle tire repair kit after a submerged branch opened a two-inch gash in the hull. That patch is still holding three summers later, and it taught me more about hull material and glue than any spec sheet ever did.
Every boat I write about starts with a timed setup on the ramp and ends with the kayak packed wet in the rain, because that is when you find out how long drying and folding really takes. I keep a hand pump, a patch kit, and a stopwatch in the truck. The stopwatch is the honest one.
How I judge an inflatable kayak setup
Four things decide whether a boat is worth your Saturday: setup time, floor stiffness, tracking in a light chop, and how the hull material patches after it gets stabbed. Everything else is color choice.
The floor is what you are paying for. Drop-stitch is not a magic word. It means thousands of polyester threads linking the floor's two layers so it inflates board-stiff instead of balloon-soft. That stiffness is the difference between paddling and floating. PSI is the number that tells you which one you have. Three PSI is a puddle. Fifteen PSI on a drop-stitch floor is a board you can kneel on.
Tracking is how straight the boat holds its line without constant correction. Bad tracking means zigzag, and zigzag means tired arms. Rocker is the curve of the hull from bow to stern. More rocker turns easier and rides waves; less rocker tracks straighter and paddles faster. A fin or skeg is the cheap fix for a boat that wanders on calm water, and it is the first thing I check on any hull that does not have one.
Weight ratings are lab numbers. A 400 lb rating means roughly 250 lb of real paddler and gear on a hot afternoon with the sun softening the hull. Every inflatable leaks eventually. The question is not whether, but whether the material patches clean and local, or spreads into a tear that keeps running.
The two boats I would start with
These two cover the two honest use cases: calm water on a budget, and two paddlers who want a longer waterline. Both include the pump and the paddles, which matters more than people think, because the nickel-and-diming on a cheap boat happens in the accessories.
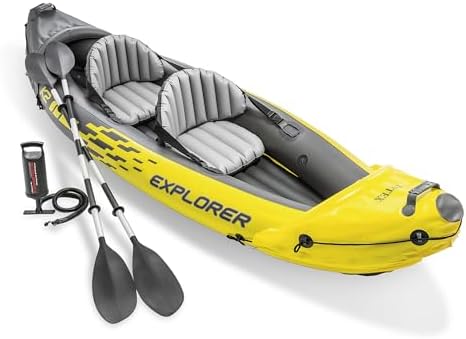
Budget pick: Intex 68307EP Explorer K2 Inflatable Kayak Set: Includes Deluxe 86in Aluminum Oars and High-Output Pump, SuperStrong PVC, Adjustable Seats with Backrest, 400lb Weight Capacity
 Visit on Amazon →
This is the boat I hand to friends who want to try a spring run without spending real money. It arrives as a complete set: 86-inch aluminum oars, a high-output hand pump, two adjustable seats with backrests, and a 400 lb capacity rating. You do not have to buy anything else to get on the water the day it shows up, and that is a bigger deal than the spec sheet suggests.
The hull is SuperStrong PVC, which is recreational-grade material. Treat it like what it is. Calm lakes, slow rivers, protected creeks, and the springs on a weekday when the water is flat. It is not a rock-garden boat and it is not a saltwater crossing boat. The oars are aluminum and they work, though anyone who paddles more than a few times a season will eventually want a lighter paddle.
Check current Amazon price before you commit, and remember the number on the listing is the whole kit, not just the hull.
Flaws but not dealbreakers: The included pump gauge is optimistic, so do not trust it as your only pressure check. Squeeze the floor with your hand. If it gives more than a firm mattress, keep pumping.
This is the right first boat for a family on a lake, a couple of casual paddlers, or anyone who wants to find out whether they actually like kayaking before spending four figures.
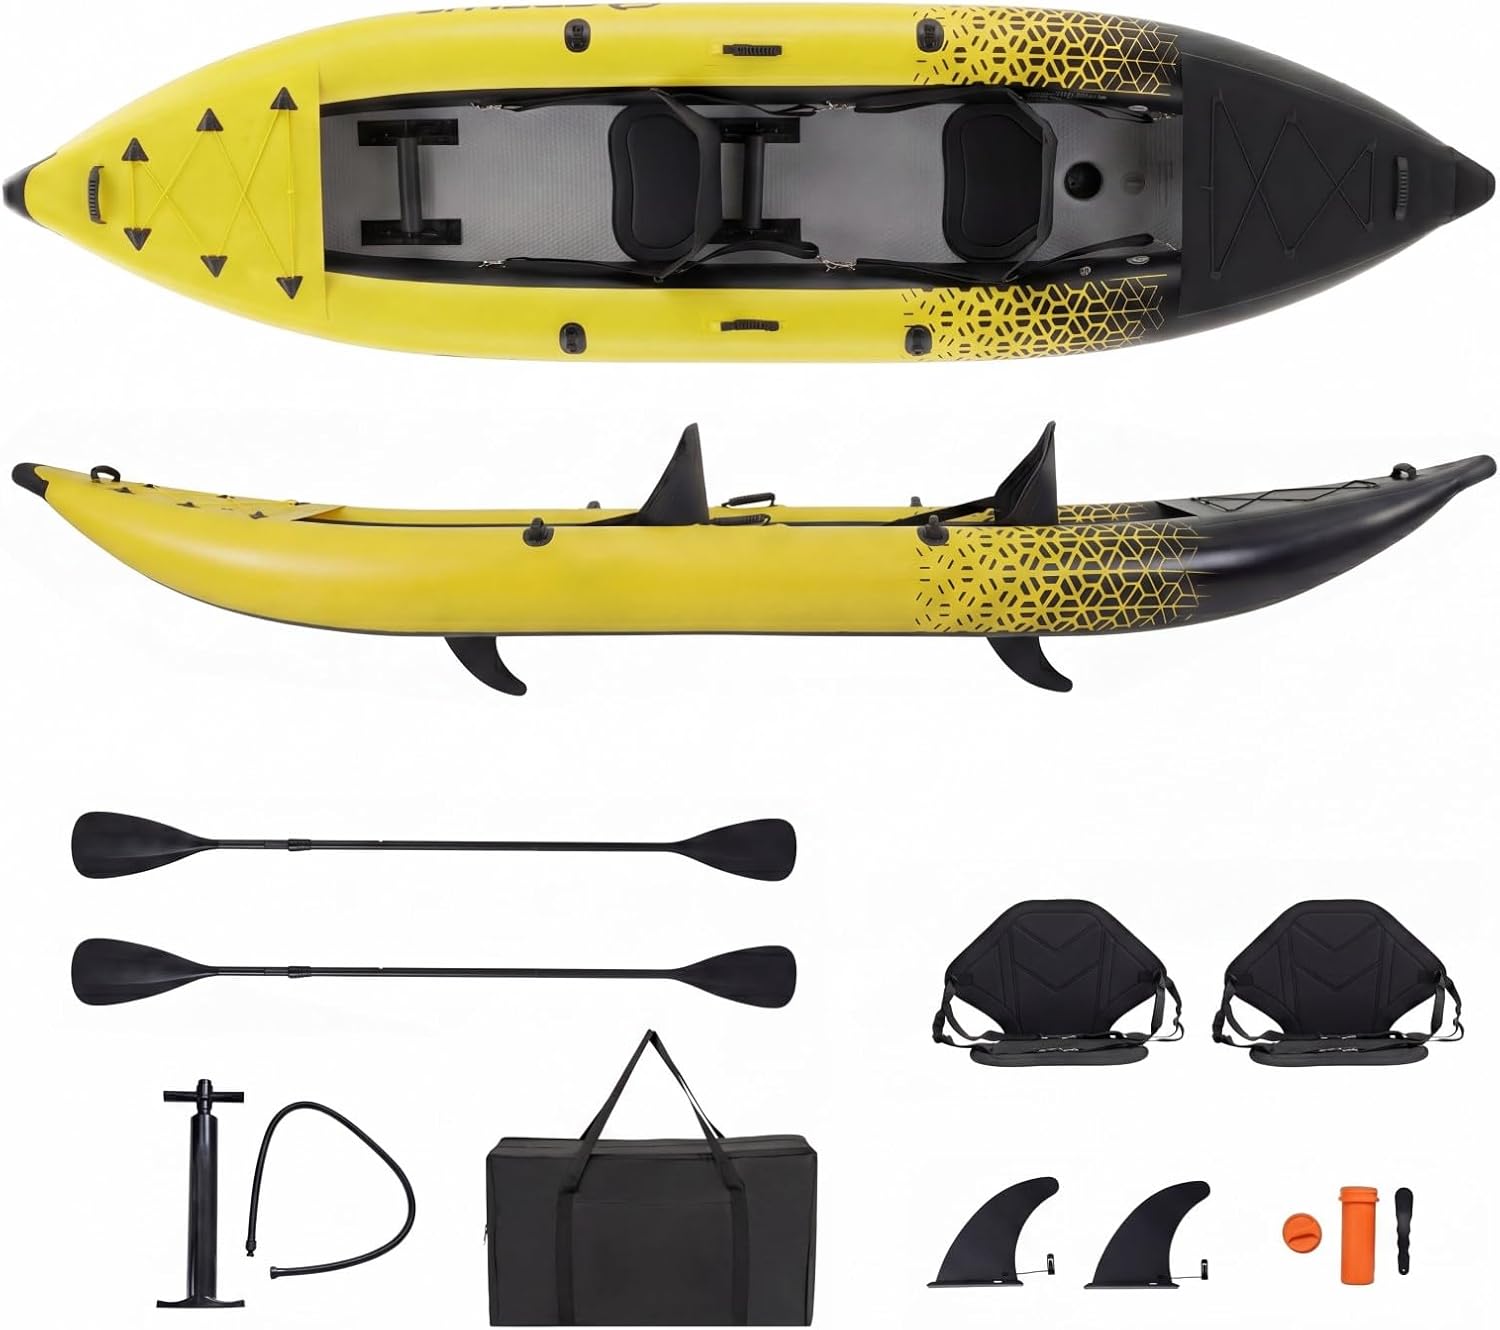
Two-person pick: GYMAX Inflatable Kayak, 12.5Ft 507lbs Tandem Kayak with 2 Aluminum Paddles, 2 Padded Seats, Footrests, 2 Fins, Hand Pump, Carry Bag & Repair Kit, 2 Person Fishing Touring Kayak for Adults
 Visit on Amazon →
Twelve and a half feet is the number that matters here. A longer waterline tracks straighter and holds speed better, which is the difference between a boat two people can actually paddle together and a boat that zigzags until somebody gives up. The 507 lb capacity rating is the lab number, but the real story is the length and the two fins underneath.
The set includes two aluminum paddles, two padded seats, footrests, a hand pump, a carry bag, and a repair kit. The footrests and the padded seats are the parts I care about most on a tandem, because a second paddler who cannot brace their feet is dead weight. The two fins are your tracking aid. Deploy them on flat water and open crossings and the boat holds its line with far fewer corrections.
Check current Amazon price, then budget your own time for the pump session. This is a bigger boat than the recreational hull above, which means more air to move and more boat to carry wet. That is the trade for a hull that behaves like a touring kayak instead of a pool toy.
Flaws but not dealbreakers: A 12.5-foot hull catches more wind than a short recreational boat, so plan your launch direction accordingly. And the repair kit is worth checking before your first trip. Patch kits with glue that has dried out in the box are one of the great frustrations of inflatable ownership.
Anyone paddling with a partner, carrying fishing gear, or covering distance on open water should start here.
The actual setup workflow
This is the order I run, every time, on any inflatable. It works whether you are on a boat ramp, a beach, or a driveway.
Step one: pick the boat for the water, not the photo. Calm lake or slow river, one paddler, short trips: the shorter recreational hull is fine. Open water, wind, two paddlers, gear, or a long crossing: go longer with fins. Buying the wrong length is the mistake that no amount of pumping fixes.
Step two: inflate it at home first. Do a full inflation in the driveway before you ever leave the house. Find the slow leak in your living room, not on the ramp with the sun going down. This also tells you how long the pump session actually takes.
Step three: floor first, then the sides. Get the floor to full pressure before you touch the side chambers. On a drop-stitch floor, you should be able to kneel on it without it collapsing under your knee. If it feels like a pillow, it is not done. Then bring the side chambers up so the boat holds its shape without wrinkles along the seams.
Step four: check the valves and the seams. Run a hand along every seam. Listen for the hiss of a valve that is not seated. A valve that is a quarter turn loose will flatten your boat in an hour, and it is a ten-second fix if you catch it on land.
Step five: set the seats. Backrest upright, but not so far back that your hips slide forward under the strap. You want to sit tall with your weight on your sit bones, not slumped against the backrest. On a tandem, set both seats before you launch. Adjusting a seat mid-river with a paddle in your lap is a bad time.
Step six: set the footrests. This is the step almost everybody skips. Set the footrest so there is a slight bend in your knee when your foot is planted. That bend lets you drive with your legs on every stroke, which is the whole reason your arms do not fall off after an hour. On the two-person hull, set the front paddler's footrests before the rear paddler climbs in.
Step seven: deploy the fins or skeg. On calm water and open crossings, drop the fin. It costs you nothing in speed and it fixes wandering. If the boat still will not hold a line, the problem is usually trim, meaning too much weight in the bow or stern, not the fin.
Step eight: load low and centered. Heavy gear goes on the floor between the seats, not piled at the bow. Keep the load centered and the boat will sit level. Weight ratings are about total load, but trim is about where that load sits, and trim is what you feel in the first hundred yards.
Step nine: launch and read the water. Point the bow slightly upstream of where you want to go and let the current do some of the work. Do not fight a current line. Read it and cross it. This is the part that took me years to learn from an old deckhand, and it is worth more than any paddle upgrade.
Step ten: land, dry, and store loose. Wipe the hull with fresh water if you have been in salt or brackish water. Dry it fully before it goes in the bag, and store it loose, not folded tight in a hot garage. Mold is real, it smells like a wet dog, and once it is in the fabric you are not getting it out.
Time the whole thing once with a stopwatch and the same pump. Three runs. That number is the truth about whether you will keep using the boat.
Caveats that decide the trip
Included pumps lie a little. Almost every hand pump that ships with a kayak has an optimistic gauge. Use the gauge as a guide and your hand as the referee.
Heat changes pressure. A boat pumped to spec in the cool morning will be harder in the afternoon sun, and a boat left fully inflated on hot asphalt is asking for a seam. Check pressure before launch, not just at the car.
The weight rating is not a promise. A 400 lb rating with a 200 lb paddler and a cooler on a hot day is a different boat than the same rating on a cool morning with one person aboard.
Carry a real patch kit and check the glue. I keep a bicycle tire patch as a backup, and the tire kit patch that saved my cheap hull is still holding after three summers. That is the standard I judge every repair by now.
Wind is the enemy of tall inflatables. If the forecast is blowing and you are on open water, launch upwind and plan to come back downwind. It is a much better day.
When these two are not the right boat
If your plan involves cold saltwater, long open crossings, rocky whitewater, or standing up to fish, neither of these is the tool. Those jobs want a drop-stitch floor that inflates board-stiff, a hull with more rocker for bouncing off rocks, or a hardshell. That is a different article and a different budget.
For flat springs, mangrove creeks, calm lakes, and slow rivers with a partner, the two boats above cover the ground honestly, and both get you on the water with nothing else to buy.
What this all costs
Both sets include the pump and the paddles, which is where cheap boats usually nickel-and-dime you. Add a patch kit, a spare pump seal if you can find one, and a dry bag for your phone, and you are done. Check current Amazon price on each listing and compare the total kit against any boat sold as a hull only, because a hull-only price is not a real price. A kayak without a pump is a very large pool toy.
The cost per trip math is easy. Twenty outings a season for three seasons is sixty launches. Divide the kit price by sixty and the number gets small fast. The variable is not the money. It is whether the pump session is short enough that you actually go.
That is the job. Get the floor stiff, set the footrests, deploy the fin, and stop fighting the current. The springs do not care what the sticker says. They care how it tracks.