Most inflatable kayak setup problems are not the boat's fault. They are an order-of-operations problem. You unroll the thing on a windy ramp, start pumping the first valve you find, and twenty minutes later you are still chasing pressure while everyone else is already floating.
I'm Sam. I paddle the springs and mangrove creeks around Tampa, and I have been doing it in inflatables for nine years. Every boat that comes through my garage gets the same treatment: a stopwatch on the ramp, the same hand pump, three timed runs, and a three-mile spring run to see how it tracks in a light chop.
That stopwatch is the reason this article exists. A recreational inflatable is a simple machine, and the difference between a good morning and a bad one comes down to whether you know the order to inflate it, where the pressure actually matters, and which of these two Intex boats fits the water you paddle.
Why you should trust me
I worked as a charter fishing deckhand in my twenties, which is where I learned to read water and wind instead of marketing copy. I own two inflatables now: a drop-stitch sea-kayak style boat that I treat carefully, and a cheap recreational tube that I do not.
The cheap one has been patched twice. The first patch went on with a bicycle tire repair kit after a submerged branch tore a two-inch gash in the hull. That patch is still holding three summers later. It taught me more about hull material and glue than any spec sheet ever has, and it is why every durability claim in this article comes back to one question: when this thing tears, how does it patch?
How I picked and how I tested
The two boats below are the ones I would hand a first-time inflatable owner, and the reason is not the color or the sticker on the side. It is the hull material, the included pump and paddle, and whether the floor stiffens up enough to paddle instead of wallow.
My routine does not change. Same hand pump, same three-mile spring run, same current. I inflate to the pressure the manufacturer marks, then I watch what happens after twenty minutes in the sun, because PVC expands and a boat that was firm at the ramp can be rock hard by the time you reach the first bend. I paddle a straight line and count the corrections it takes to hold it. Then I come home and patch-test the hull material, because every inflatable leaks eventually and the only question that matters is whether a tear stays a tear or spreads.
What disqualifies a boat is always the same short list: a floor that never gets stiff, one giant chamber instead of separate ones, and a patch kit with glue that was already dried out in the box. If a boat fails any of those, the setup time is irrelevant, because you will never trust it far from the ramp.
The two boats worth starting with
Both of these come with the pump and the paddle in the box, which matters more than most buyers realize. A cheap boat with a cheap pump is not a cheap boat. It is a slow boat, and you will spend the money you saved on a pump that works.
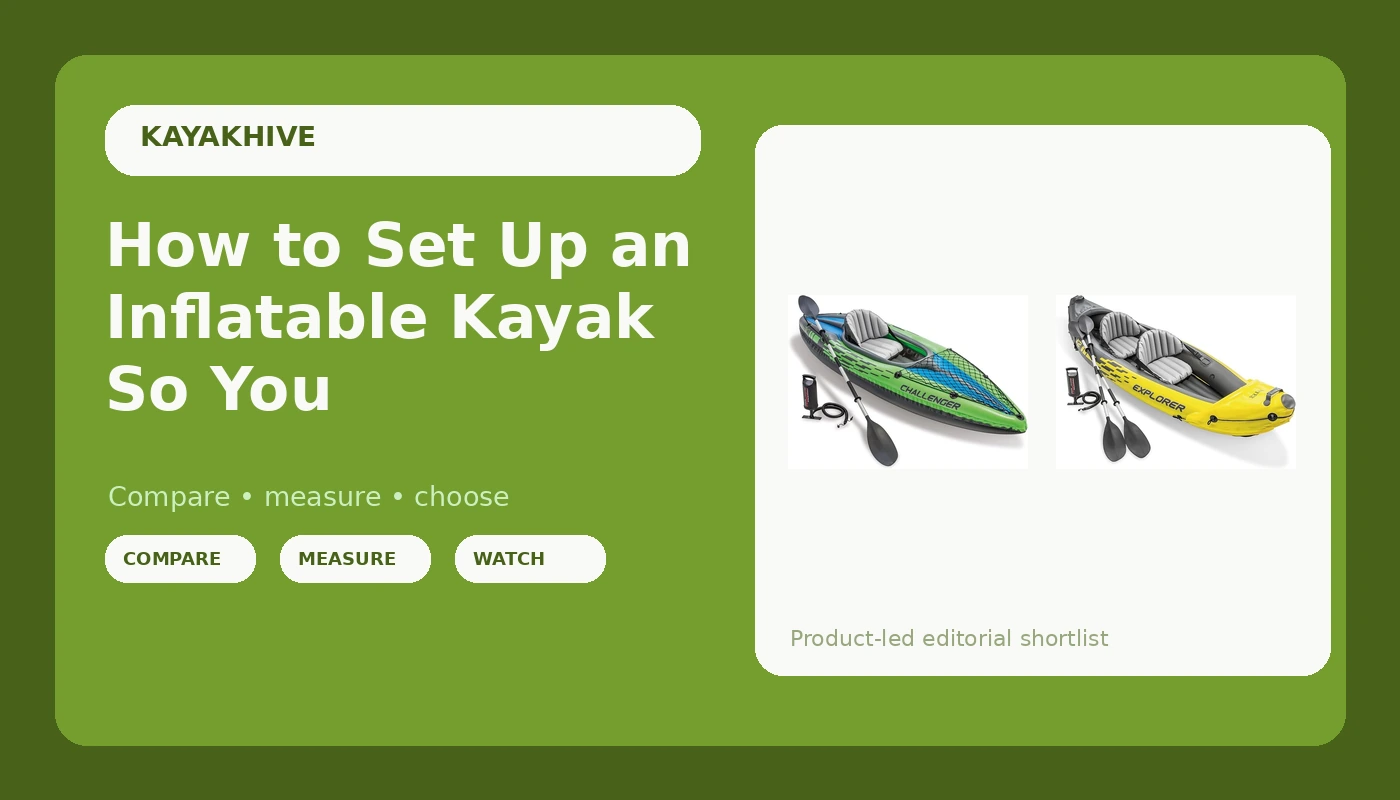
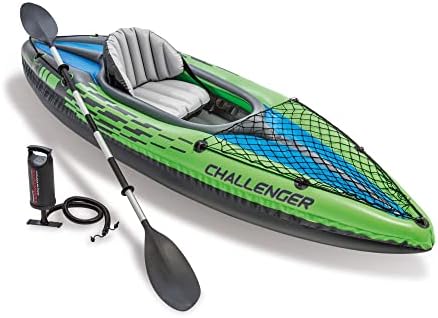
Budget solo pick: INTEX Challenger Inflatable Kayak Series: Includes Deluxe 86in Kayak Paddles and High-Output Pump, SuperStrong PVC, Adjustable Seat with Backrest, Removable Skeg, Cargo Storage Net
 Visit on Amazon →
This is the best budget pick for one paddler, and I want to be honest about what it is. It is a pool toy with delusions. That sounds like an insult until you remember how much of the market is a pool toy without the delusions. This one at least gets the details right for the money: SuperStrong PVC hull, an adjustable seat with a backrest, a removable skeg, a cargo net, and an 86-inch paddle and high-output pump included.
The skeg is the piece people ignore, and it is the piece that decides whether you enjoy the day. A flat-bottomed inflatable without a fin wanders. Deploy the skeg on open water and you will hold a line with half the corrections. It is removable for a reason, so take it off in shallow water where it will drag.
Where this boat belongs is calm lakes, slow rivers, and protected bays. Where it does not belong is a spring run with current and rock, or anywhere you would be embarrassed to be seen in a pool toy. The floor is not drop-stitch, so you sit lower in the water and you feel every ripple that crosses the hull.
Flaws but not dealbreakers: The included paddle is heavy aluminum, the kind that makes your shoulders ache by hour three. Upgrade the paddle before you upgrade the boat. The soft floor also means your knees and ankles do more work than they would in a stiffer hull.
A solo paddler who wants to be on flat water this weekend without spending much will be happy here.
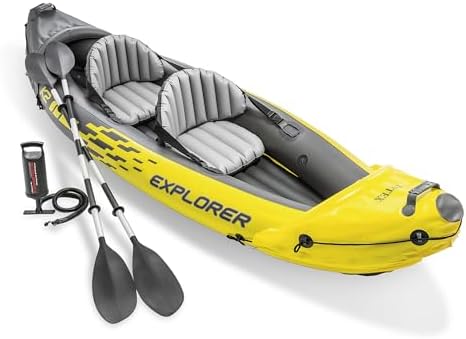
Tandem pick: Intex 68307EP Explorer K2 Inflatable Kayak Set: Includes Deluxe 86in Aluminum Oars and High-Output Pump, SuperStrong PVC, Adjustable Seats with Backrest, 400lb Weight Capacity
 Visit on Amazon →
This is the two-person version of the same idea, and it is the one I would point a couple or a parent-and-kid pair toward. Two adjustable seats with backrests, two 86-inch aluminum oars, the high-output pump, and a PVC hull with a listed 400-pound weight capacity.
Read that weight rating the way I read all of them: as a lab number. A 400-pound rating is measured in conditions that do not exist on a hot afternoon with a cooler in the bow. Two adults plus gear is a real load, and the boat will sit lower and paddle slower than the number suggests. Keep it to two adults and light gear, or one adult and one kid, and it behaves.
The longer hull tracks better than the solo boat, especially with two paddlers who can keep a rhythm. Two people who cannot paddle together will zigzag no matter how good the hull is, so settle on a cadence before you leave the ramp.
Flaws but not dealbreakers: The seats are not all-day seats. They are fine for a couple of hours and a picnic. The hull is wide, which is what makes it stable, and also what makes it slow. Do not plan a ten-mile day in it.
Anyone who wants to bring a second paddler along on calm water without buying two boats should start here.
The actual setup workflow
Now the part you came for. This order works on either boat above, and on most recreational inflatables. If you only remember one thing, remember that you bring the whole hull up together instead of finishing one chamber at a time.
Step one: Stage the boat. Find flat ground, out of the wind if you can. Wind is the enemy of an unrolled hull, and sand in a valve is the enemy of everything. Lay the boat out, check that both valves are closed, and keep the valve area clear while you work.
Step two: Inflate the floor or base chamber first. The base gives the side chambers something to push against. If you inflate the sides first, you spend the rest of the job fighting the hull for shape.
Step three: Bring the side chambers up evenly. Get each one to roughly 80 percent, then go back and top them off together. This is where most people lose time: they fill one side to full pressure, then the other, and the hull twists as a result.
Step four: Top off to the marked pressure. Three PSI is a puddle. Read the gauge on the pump and stop where the boat tells you to stop. Overinflation is how seams fail, and Florida sun will do the overinflating for you if you let it.
Step five: Install the skeg before you launch. On the Challenger it is removable, and it is a genuine pain to seat once you are floating. Put it on at the truck.
Step six: Set the seats. Inflate the backrest, then position the seat so your knees are slightly bent and your lower back is supported. A seat set too far back puts your shoulders behind your hips, and you will feel it within an hour.
Step seven: Load gear low and centered. The cargo net is for a dry bag, not a cooler. Keep weight over the floor, tie anything loose to the boat, and leave the bow light so it rides over chop instead of plowing into it.
Step eight: Recheck pressure after twenty minutes on the water. This is the step nobody does. Sun and warm water raise pressure in a PVC hull. If the boat feels rock hard at the first bend, bleed a little from each chamber. If it feels soft, add. This one habit is the difference between a boat that lasts five seasons and a seam that lets go in July.
Step nine: Deflate in reverse and dry it. Side chambers first, then the base. Fold from the bow, keep sand out of the folds, and dry the boat before it goes in the bag. Do as I say here. I have a mold spot in my own storage bag that says I did not.
Tracking and trim, or why you zigzag
Tracking is how straight the boat holds its line without constant corrections. Bad tracking means zigzag, and zigzag means tired arms. Three things fix it: a skeg, weight distribution, and paddling together if there are two of you.
Rocker is the curve of the hull from bow to stern. More rocker turns easier and rides waves better. Less rocker tracks straighter and paddles faster. A recreational inflatable like these two sits at the stable, forgiving end of that scale, which is exactly what you want on flat water and exactly what you do not want in a headwind.
If the boat weathercocks, meaning the bow keeps turning into the wind, move weight forward. If the bow digs in, move weight back. Trim is free and it works better than paddling harder.
Patching: the skill that decides everything
Every inflatable leaks eventually. The question is how easy it is to patch, and the answer lives in the hull material and the glue, not the marketing copy.
Carry a patch kit and a small bottle of alcohol. When you get a puncture, deflate the chamber, clean the area, and cut the patch round. Round patches do not peel at the corners the way square ones do. Apply the glue, let it tack until it is sticky rather than wet, press the patch down hard, and give it time before you reinflate. A patch that gets inflated too early will lift, and a lifted patch is a patch you do again.
Flaws but not dealbreakers: The patch kit in the box is often the weak link, and dried-out glue is the most common reason a field repair fails. Check the tube before your first trip. If it is already hard, buy fresh cement and keep it in the truck.
What this all costs
I will not quote prices here, because they move and because the number on the box is not the number that matters. Check current Amazon price on both boats and do the math with the full kit included. Both of these come with the pump and the paddle, and both use PVC hulls that patch cleanly with ordinary cement, which is what actually keeps a budget boat in service.
Spread over five summers of weekend paddling, either boat costs less per trip than the gas it takes to reach the ramp. The solo Challenger is the cheaper way in, and the tandem Explorer K2 costs a little more for a second seat and a longer hull.
The setup is the part you control. Learn the order once, keep a stopwatch on yourself for the first three trips, and you will be on the water in minutes while the guy next to you is still looking for the second valve.